When it comes to running centers in a primary classroom, there are so many things to figure out an manage. Let’s walk through a day in the life of a 1st grade teacher, Valerie, and how she runs centers in her classroom.

I often get questions about how I run centers in my classroom, so here’s a look at my daily routine! Keep in mind, I tweak things every year based on my students’ needs—what works one year may need adjustments the next.

Mixing Literacy and Math Centers
Instead of keeping literacy and math centers separate, I mix them into one rotation board. I typically have 12 centers running at a time—6 literacy and 6 math—with students alternating between the two.
How It Works:
- Even-numbered centers = literacy
- Odd-numbered centers = mathCenters are stored in
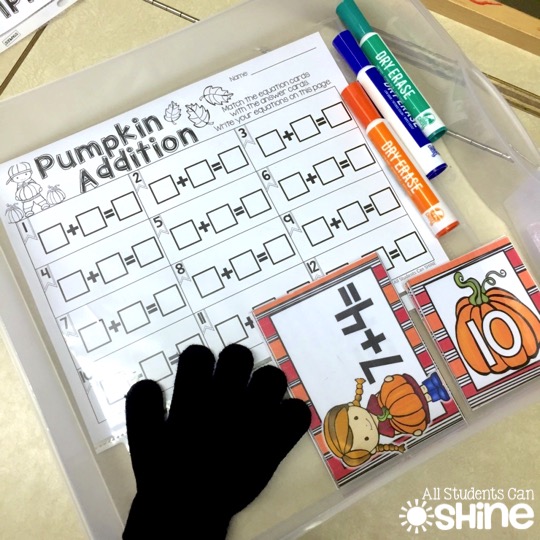
I use Sterilite drawers for easy access.
Each drawer includes:
- Cards
- Manipulatives
- Dry erase markers & black gloves (for erasing)
- Recording pages in plastic sleeves to save paper

I put the recording pages in plastic protectors and let kids write on them with dry erase markers. They make it easy to erase and it is much cheaper than buying those fancy pockets.
Managing Center Rotations
This is what my rotation board looks like. I made it with the editable cards in this classroom labels set.
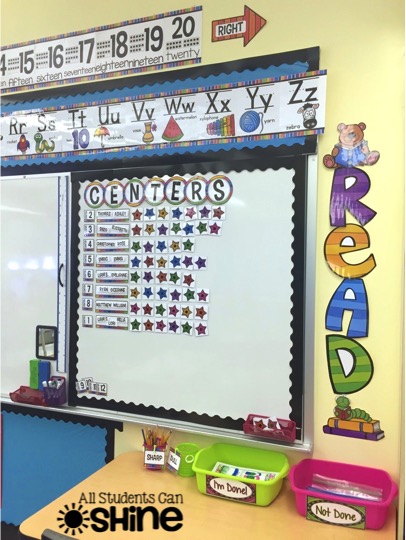
Students work in heterogeneous groups, and I pull kids for guided reading during center time. I use Velcro strips on my rotation board to make adjusting groups easy.
How students find their centers:
1) They check the rotation board for their assigned center number
2) They hold up their fingers to show their number before starting
3) They grab their drawer and find a work spot with their partner
4) They begin working while I pull my guided reading groups

Every time we complete a rotation of centers, I change the activities and the groups. I like to make my groups heterogenous and I pull kids for my guided reading during center work. If this way of grouping your students doesn’t work for you, that’s okay. We all do what works best for us in our classroom.
Flexible Seating & Classroom Expectations
Students can choose their own work spots, as long as they make good choices. If needed, I’ll step in and move them, but this doesn’t happen often.
Our center rules are very similar to the Daily 5 rules:
- Start right away
- Stay in one spot
- Work quietly
- Work the whole time
- Clean up your station
How I Run Centers Each Morning
Want to know what a typical morning looks like in my classroom? Here’s how it flows:
- Rotate the Centers – I move all the numbers down and put the bottom one on top.
- Students Show Their Number – Before we begin, I ask students to hold up their fingers to show their center number. This quick check ensures everyone knows where they’re going.
- Grab Materials & Get Started – Students pick up their center drawer and find a work spot with their partner. They start working right away while I walk around to check in.
- Guided Reading Time – Once the class is settled, I pull my guided reading groups for 15-20 minutes.
- Wrapping Up Centers – When it’s time to stop, I turn off the lights. Students immediately put their hands on their heads and look at me—no need to raise my voice! Light off = stop.
- Clean Up & Transition – Students put their materials away and return to their seats.
- Stars for Good Work – I hand out stars to teams that followed expectations. Sometimes, we discuss why a group earned a star (or why they didn’t, if they want to share).

Quick Classroom Management During Centers
Try these tips to make your center time run smoothly:
- Off-task students follow a three-strike system—on strike three, they sit near me and observe my small group
- If noise levels rise, I call out “uh oh!” as a quiet reminder or turn off the lights to get everyone’s attention
A Fun Trick for Teaching Whispering vs. Talking
Want to help kids understand the difference between talking and whispering? Try this simple activity:
- Place your fingers on your throat and say your name—you’ll feel vibrations.
- Now whisper your name—no vibrations!
This quick and easy trick makes it clear why whispering sounds softer and helps encourage a quieter classroom.

That’s How Centers Work in My Classroom!
Running centers this way keeps things structured yet flexible, allowing for independent learning while I focus on small-group instruction. Every year looks a little different, but the goal is always the same—engaged, motivated learners!
Get Everything in This Post and More!
Looking for easy, ready-to-use resources for your classroom? Get unlimited access to everything mentioned in this post plus so much more!